
How to Calibrate a CR-10
After a while, maybe years of fantasizing about the amazing things you will do when you get a CR-10, you’ve finally got one in your hands, and you don’t know what to do next.
Or maybe you are yet to get one but are curious about how the setup and calibration work so you can jump right into it when it’s time. Don’t fret! You are reading the right article. In no time, you will find out how to calibrate a CR-10 and get your new 3D printing adventure on the way, with amazing results.
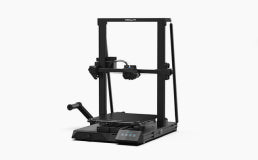
The CR-10 3D printer is one of the products that the Creality brand is not afraid to boast about, and for the most part, the 3D printing community has nothing against it. Even with its successors, it has managed to retain its pride of place as a darling of the 3D printing world.
One of the features you will enjoy with your CR-10 is its large build spaces. With that amount of space, there’s a wider scope of possibilities available to express your creativity. It operates with minimal noise, the strength of its aluminum frame is super-reassuring, and lastly, to mention just one more of its many unique features, it has flat glass print beds.
Calibration seems to be the missing piece of the puzzle, or if you like, the last obstacle to having a perfect CR-10. With all of its amazing features, a 3D printer like the CR-10 shouldn't have any reason not to deliver superior quality prints.
Enough said. It’s time to dig into how to get the right adjustments to the CR-10. Shall we?
How to Calibrate Your CR-10
Several parts of your CR-10 may need to be adjusted for you to have a smooth ride with your printer. “Having a smooth ride means” achieving a perfect (or almost perfect) print every time. And just in case you don’t get a perfect print, calibrating your printer will ensure that the printer isn’t at fault. Below is a rundown of the various parts of your CR-10 that require adjusting and the steps to achieving the right positions.
Fixing the First Print Layer
Just like the foundation of a building has to be done right to get a safe structure, the first layer of every print exercise has to be spot on to achieve a successful operation. Imagine having to call off your print and begin again because the first layer didn’t quite come out right? Frustrating right? Now imagine this happening several times before you finally get it right.
The major reason why your first layer of print may not come out well is the distance between the hot end nozzle and the print bed. When the nozzle of the hot-end is too far away, your print will not find a solid connection with the glass print bed and this will be the beginning of trouble for the operation.
On the other hand, when the nozzle of the hot-end is too close to the print bed, your first layer of print will not spread out evenly on the print bed. To solve this challenge, you need to take certain steps towards ensuring that the nozzle is at the right distance from the bed.
This procedure is called adjusting the Z offset. These are the steps below;
- Set the printer to “Home” by selecting Motion > Auto Home (the nozzle then assumes an offset which is usually 10mm.)
- Set Soft Endstops to “off” (Motion > Move Axis > Soft Endstops > Off.
- Set the X and Y axis to a high distance of say 120mm by selecting Motion > Move Axis > Move X and Motion > Move Axis > Move Y respectively
- Set a piece of paper under the nozzle
- Set Z axis to zero (Motion > Move Axis > Move Z.) If the nozzle is still not making contact with the bed, select Main > Configuration > Probe Z Offset. Adjust until the nozzle makes contact with the paper on the print bed.
- Perform step 5 while moving the paper back and forth between the nozzle and the bed until you achieve a moderate tightness. That is, the friction between the nozzle and the paper is moderate; not too tight, and not too loose.
- Select Store Settings to save the present position.
Now on, when you select Home, the nozzle sets itself to this position. This setup will ensure that your CR-10 is ready to print at the right distance.
Bed Leveling
Bed leveling is a procedure that ensures your print bed is at a uniform distance from the hot end nozzle. When there is a discrepancy in your print bed’s distance from the nozzle, you are going to experience a lot of print failures. If you want your printer to give you the best results, it is necessary to follow the steps below to adjust your print bed.
- Set the stage by heating your nozzle and bed to the temperatures you will frequently print at. This depends on the primary kind of printing you intend to carry out afterward. Creality suggests 210 degrees for the nozzle and 60 degrees for the print bed. It is important to heat the nozzle and the bed to get the right bed level when thermal expansion happens during the printing process.
- Set the Z-axis to zero.
- Free up the X and Y positions for future adjustments by disabling the stepper motors.
- Set the nozzle a little from the leveling nut by changing the position of the hot end.
- Insert a sheet of paper between the nozzle and the print bed.
- While looking from the top, adjust the knob to move the bed upwards or downwards while sliding the paper until the nozzle achieves moderate friction with the paper and the bed.
- Repeat this process for all the other corners of the bed ensuring that the hot end nozzle achieves the same moderate friction with the paper and bed.
If your CR-10 requires frequent bed leveling (which is rare), or you want to save yourself the hassle of leveling the bed after every change in extruder or nozzle, the auto bed leveling kit is what you need.
The auto bed leveling kit uses the BLTouch sensor which will automatically assess the distance between the bed and the nozzle across the bed surface and make the necessary adjustments. Only the CR-10 max comes with the auto-leveling kit, so if you use the CR-10 or CR-10 mini, you can get one from Amazon.
Apart from adjusting the level, your printer may have floppy Z axes. This lack of firmness may cause the hot-end to make slight shifts in both the upward and downward direction when the printer is in action.
You can prevent this from happening by checking the Z axes for any nut that needs to be properly tightened. Get a wrench from the stock tools and tighten the eccentric nut and turn the axle on the nut in the direction of the Z axes bar till it is tight enough.
Now your printer’s Z axes will remain in position and safely too if you make sure not to tighten the nut too much.
How to Calibrate CR-10 Extruders
It’s quite easy to tell if your extruder steps are accurate or not. Simply set the printer to print a specific length of the filament. When it does, measure the result to see if it matches with the instructed dimension. If it doesn’t, then you should calibrate it.
Since the extruder is responsible for the amount of plastic that the hot-end receives, it is one of the most likely causes of print defects. To correct this challenge, you will need to calibrate your 3D extruders. To do this, a caliper is a major requirement, and then follow these steps.
- Using your caliper, measure a certain length, say 50mm from the extruder, and make a mark on the filament. Make additional marks at the 65, 70, and 75 mm lengths so you can monitor the situation if it over-extrudes.
- Preheat the nozzle to the temperature that you will most commonly use, set the extruder to the 50mm point and let the printer execute the command. If the mark on the filament isn’t exactly on the extruder, the extruder requires calibration. For under extrusion, measure the difference with a meter rule and subtract it from 50mm. For over extrusion, measure the difference between the extrusion and the nearest additional mark and subtract it from the additional mark.
- Perform a simple calculation using the e-steps of the CR-10 which is 93.0 steps/min. That is, multiply the e-steps by the expected extrusion amount of 50mm and then divide the answer by the value you got from step 2.
- Store your answer on your printer by selecting the save to EEPROM option.
Conclusion
With all of its super qualities, the only thing that may stand in the way of your CR-10 living up to expectations is a thorough calibration. Knowing how to calibrate your printer is crucial because you shouldn’t get anything less than the best quality prints. If you can successfully fix the print layer, set the bed leveling, and calibrate the extruder, your CR-10 should be good to go and remain so for a long time.
Leave a comment