
How to Calibrate the Ender 3
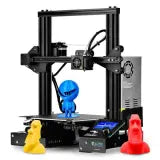
Creality’s Ender 3 printers are fan-favorites for their accessibility and affordability. They are considered among the highest performing budget and mid-range printers for beginners and seasoned makers alike. Calibrating your Ender 3 helps make sure that there is a low margin of error for filament deposition and model movement during the printing process.
What is calibration?
Calibration is critical for ensuring that all components of your 3D printer are properly aligned and ready to print. Ender 3 printers such as the Pro and V2 should be calibrated before their first use, but we also recommend that makers occasionally run a full calibration as part of their regular maintenance schedule.
This article details the calibration process step-by-step for easy referencing whether you just opened the box or have printed hundreds of models.
Whenever making adjustments to your printer, we always recommend having test prints ready to ensure that everything is working smoothly. A calibration cube and the tried-and-true Benchy are great choices for post-calibration testing to make sure that no further changes are needed.
Check the screws
Creality’s printers pack a punch for their price point, but many users have reported quality control issues, such as loose screws or uneven build platforms upon opening the box. Even if your printer was perfectly calibrated the first time you used it, the vibrations and mechanical movements during the printing process can put strain on different parts over time, so all connections and screws should be checked regularly.
Tighten all screws until just secure with a screwdriver—never use power tools on delicate parts. Take care to not over-tighten screws as this can lead to stripping or difficulty with disassembly (such as for repairs or modifications) in the future.
Level the bed
All 3D print hobbyists will become familiar with bed leveling at some point. Most print problems can be traced back to a poorly calibrated bed, so resetting the bed during a full printer calibration is highly recommended. Adjusting the Ender 3’s bed is generally quick and simple:
- Press “Home” on the touch screen to return all axes to their original home positions.
- Press “Disable Steppers.”
- Move the print head to one corner with some clearance between the head and build platform.
- Place a piece of paper on the build platform.
- Unscrew the knob underneath one corner of the build platform while moving the paper slightly until there is slight friction between the print head and the paper.
- Repeat Step 5 for each corner of the print bed.
- Re-check all corners to ensure that there is even resistance between the print head and paper across the bed.
Tighten the belts
The Ender 3 is equipped with belts that ensure accuracy and even printing. Loose belts can throw off the dimensions of the print and disrupt layer deposition.
For the original Ender 3 and the Ender 3 Pro, the belts can be accessed by unscrewing the brackets that secure the bearings. The bearings can be moved to generate sufficient tension between the stepper motor and bearing.
For the Ender 3 V2, the X- and Y-axes are equipped with screws that allow for easy and rapid adjustments. As we noted when discussing screws, take care to not over-tighten the belts. Stop tightening once you feel tension.
Calibrate the extruder
To avoid problems with over- or under-extrusion, E-step calibration is critical. To identify the right E-steps for your Ender 3, all you need is a bit of math and time with only three inputs.
Before starting extruder calibration, make sure that your firmware is up to date. This ensures that any changes to the settings will be read by the printer.
- Measure your filament to 100 mm from a set point on your extruder and mark this spot.
- Make one mark 10 mm above the original point and another mark 10 mm below it.
- Heat up your hot end and extrude 100 mm of filament by pressing “Prepare > Move axis > Move 1 mm” and then slowly rotating the knob until 100 mm is selected.
- After the printer has finished extruding, check whether the filament reached or passed the 100-mm mark. If this mark has passed the extruder, then your extruder is over-extruding; if it hasn’t reached the mark, then it’s under-extruding.
- Using the 10 mm marks above and below the 100-mm mark, estimate the amount of filament extruded that is over- or under-extruded.
- Multiply the current E-steps by 100, then this number by the actual distance your filament was extruded. The resulting value will be your new, correct E-step value.
- Select “Control > Motion.” Scroll to “E-steps/mm” and input the updated E-step value.
Adjust the eccentric nuts
Eccentric nuts maintain proper tension on the Ender 3’s V-wheels. These nuts are located under the bed and on the X carriage. Only adjust these nuts using the special wrench provided with the printer.
The nuts should be tight enough to inhibit bed rotation or tilting but not so tight that it inhibits motion.
We recommend loosening all the nuts slightly and adjusting all of them in rounds to ensure that even tension is being maintained.
The X carriage should be adjusted this way as well. Make sure the horizontal carriage does not exhibit too much vertical motion.
With these simple steps, your printer is ready for printing! Because different models, filaments, and ambient conditions can lead to minor changes between prints, we recommend running some test prints to fine-tune any settings after manual calibration.
Leave a comment