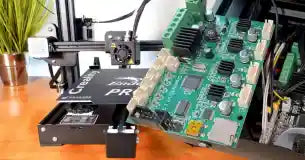
How to update firmware on the Ender 3 Pro/V2
Firmware refers to the operating system that runs on the 3D printer's microcontroller and translates G-code commands into signals that can be read by the printer’s components. Keeping the firmware on your Ender 3 V2 up to date is crucial for ensuring that all the parts work correctly with new files, sync with the slicer, and can interface with any third party applications.
We recommend checking for updates semi-regularly to make sure that no big print fails occur due to out-of-date firmware. Creality has made updating the Ender 3 V2 easy, and this guide details the process so you don’t have to think twice.
Getting started
Before actually downloading the update file, you have to determine the current firmware version that your printer is running.
On your Ender 3 V2, navigate to Info using the selection knob. This page shows which version is currently running on the printer.
To make sure that the correct firmware update is selected from Creality’s site, you have to check which type your printer requires. There are three firmware types used in this type of printer: mainboard without BLTouch, mainboard with BLTouch and an adapter, and mainboard with BLTouch without an adapter.
If you don’t know which type is needed for your printer, you can check by looking at the label on the printer’s motherboard.
The electronics enclosure is located in the printer’s base. To open it, make sure the printer is completely disconnected and powered down and remove the cover from the enclosure. Under the Creality logo, take note of the board version number.
How to update the Ender 3 V2/Pro firmware
- Download the firmware update from Creality
- Unzip the file
- Savethe .bin update file to a MicroSD card
- Install the firmware update on the Ender 3 V2
Download update file from Creality
Navigate to the Creality download page at www.creality.com/download. On the left side of the page, click “Ender Series Firmware.” Select the appropriate drop-down item for the Ender 3 V2 or Pro.
Identify the .zip file that is compatible with your board. For example, if you have a BLtouch board, make sure that the file name includes “Compatible with BLTouch.”
Unzip the firmware archive
Save the .zip archive. Using your preferred application, unzip the file.
Save the update to a MicroSD card
The update file must be moved to a MicroSD card to be read by the Ender 3.
If you don’t have a new MicroSD card or are not sure if the one you are using has been used previously, use your computer’s file explorer to format the MicroSD card. This “resets” the card and ensures that no other files will disrupt the firmware update.
Then, open the unzipped file downloaded from Creality’s website. Locate the .bin file with the newest firmware update. Move this file to the MicroSD card. Use your computer’s eject function to safely eject the MicroSD card.
Install the firmware update on the Ender 3 V2
Before installing the update, ensure that your printer is turned off.
Insert the MicroSD card containing the update file into the Ender 3 V2. Then, power on the printer. The screen will be blank before starting up. The firmware update will be installed automatically, so all you have to do is wait until the printer is finished booting up.
After the update is complete, remove the MicroSD card and get printing!


Leave a comment