

SLA Post-Processing: How to Finish, Clean, and Perfect Resin Prints
Post-processing is critical for bringing SLA 3D prints to life. This guide covers everything you need to know about polishing and finishing resin prints.
Is it necessary?
Resin prints are known for their unparalleled high-resolution details. However, these perfect prints don’t just pop out of your printer. Post-processing is essential for taking full advantage of your SLA printer and the qualities of 3D printed resin. The term “post-processing” includes everything from cleaning to affixing all parts of a large print together to epoxy coating the final product. We cover the basic steps for cleaning and finishing your resin prints.
Safety first
SLA resins give off fumes during printing and can be abrasive to skin on contact. It is important to have a clean, open, well-ventilated workspace with appropriate PPE. Some finishing methods covered in this article require more safety precautions and open space than others, so be sure to carefully read through any process you’re attempting to undertake before getting started.
Make sure you have the following before getting started:
- Nitrile gloves
- Safety glasses
- Ventilated workspace
- Clear desk or table work area
- (Optional) Filtering mask
If resin or cleaning chemicals come in contact with bare skin, be sure to wash it immediately with soap and water.
Step 1: Rinsing
All 3D printed resin objects come out of the printer with a fine layer of resin coating the surface. This needs to be removed prior to any final finishing.
Method 1: Ultrasonic bath
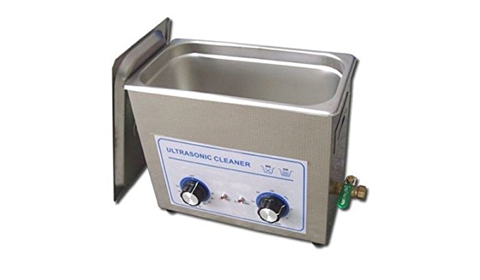
Ultrasonic baths are widely used for cleaning jewelry and delicate materials. If you frequently print resin objects, it is worth investing in a moderately sized ultrasonic bath. Fill the bath with cleaner fluid, ensuring it covers your print. After the bath has run for around 5 minutes, remove the print. This method removes the layer of uncured resin stuck to your print, leaving behind a smooth, clean finish.
Method 2: Dunk and rinse

If you do not have an ultrasonic bath, you can get a similar result by submerging your print into a tub of IPA or similar cleaning solution. Because there is no agitation mechanism in this method, you have to move the print around and rinse it well to remove the resin outer layer. While this method is simple and easy, it is not as effective as an ultrasonic bath. We strongly recommend submerging, agitating, and rinsing the print at least 3 times. More rinses may be needed for highly detailed prints as more nooks and crevices means that more resin is likely to get stuck on the print.
Step 2: Removing supports
It is typically easier to remove all supports before curing while the resin is still somewhat pliable. Supports can either be broken off by hand, which is suitable for larger and less finely detailed prints, or cut using flush cutters. When cutting, be sure to cut the supports as close to the print surface as possible to minimize the amount of sanding required.
After supports are removed, sand down the nubs left over. A progressive sanding technique using 150-, 220-, 400-, 800-, 1000-, and 2000-grit sandpapers is recommended, but you can choose the level of grit best suited to the detail and finish of your particular print.
Step 3: Curing
Curing is necessary to ensure that 3D resin prints are firm and stable. There are several methods for curing that use various UV light sources.
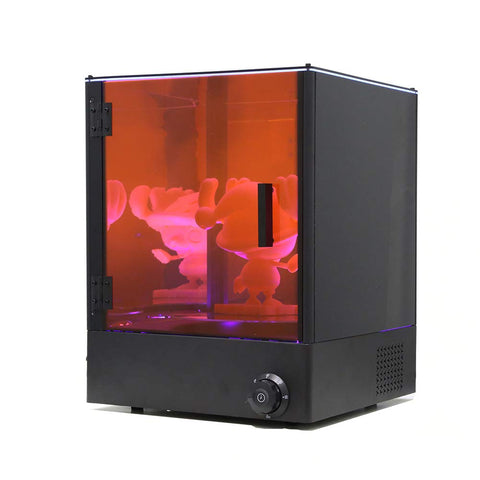
Method 1: Curing station

SLA printing manufacturers and 3D printing marketplaces sell curing states that are specifically designed to cure resin prints. These allow for tuned curing times and even curing throughout the print. These can get pricey, but they are highly recommended for makers who consistently print large parts or print industrially or for sale.
Method 2: Nail polish curing lamp
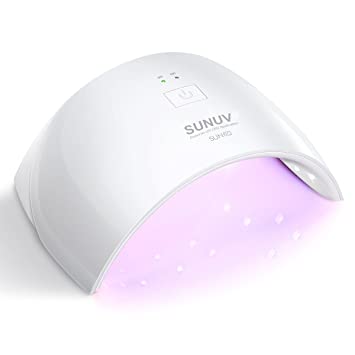
UV nail lamps are fairly inexpensive and easy to acquire online. They are typically outfitted with various timers and are best for smaller prints. Because the UV intensity is usually lower than that of professional 3D print curing stations, you will likely have to leave your part under the lamp for several hours or overnight. Some lamps have auto-turnoff features, so pay attention when picking out a lamp to ensure that the curing process isn’t terminated halfway through.
Method #3: DIY curing station
Many makers design and build their own curing stations using standalone UV lights and a closeable box lined with foil or other reflective material. Using a turntable in a makeshift curing station is highly recommended to ensure even curing.
Method #3: Use the sun
Live in an area with bright sun for several hours out of the day? Put that free solar power to use. You can place your part outside on a sunny day to get consistent (and free) curing. This method takes the longest and may not be suitable for those living in areas with bugs or dusty winds, as they can affect the final finish of your print. Some hobbyists have developed small glass or plastic enclosures to place prints in while curing in the sun.
Perfecting prints
After your first few resin prints, you will develop a good sense of the print settings, rinsing method, and curing techniques that yield the best results for the types of prints you like to create. There are many auxiliary tools that can be helpful for perfecting resin prints, such as squirt bottles for removing pooled resin in print crevices, wet sanding materials for achieving a super-high polish, and epoxy for adding an extra layer of hardness and shine.
Leave a comment