
Comprehensive 3d Printing Troubleshooting Guide
Nothing is printing - Out of Filament
What’s the problem?
Although the model has been set and configured correctly in the slicing software, nothing is printing. No filament is being extruded, or only small portions are coming out.
Why is it happening?
Many printers do not have visible filament housing or built-in sensors, making it difficult to determine when you will run out of 3d solutech flexible filament. This can be particularly distressing if it happens mid-print.
Troubleshooting - Check the Filament Reel
Look at the filament reel and see if there is any filament left. If not, extrude or manually remove any remaining filament in the nozzle and replace the filament reel.
Nozzle too close to print bed
What’s the problem?
After calibration, the nozzle is not depositing any filament on the print bed.
Why is it happening?
This issue often occurs when the nozzle is too close to the print bed. It is possible that the bed is only just too close to the nozzle, but this can cause serious issues ranging from a foundationless print or backed-up filament in the nozzle.
Z-Axis Offset - Troubleshooting
Raising the height of the nozzle slightly can often address this problem. In your printer’s settings, you should be able to set a Z-axis offset. Raising the nozzle away from the print bed requires that you increase the offset by a positive value.
Be careful not to set the offset too high as it will not stick to the platform.
Lower the Print Bed
You can also lower the print bed to deal with this, but it is often more cumbersome and requires extra calibration.
Blocked Nozzle
What’s the problem?
You initiate a print job, but nothing comes out of the nozzle, even after extracting and reinserting filament.
Why is it happening?
You may experience a blocked nozzle if a small piece of filament has been melted but not extruded properly, causing it to stick to the interior of the nozzle and block new filament.
Maintenance is the best way to prevent a blocked nozzle. Regularly cleaning the nozzle, using a filter, and ensuring that you are using the manufacturer’s recommended temperatures are the best methods for pre-empting any blockage issues.
Manually unblocking a clogged nozzle can be somewhat dangerous for your printer, so it should be done carefully.
Troubleshooting
Unblock with a needle or other thin, stiff piece of metal
Begin by removing the filament. If your printer has a control panel, select the “heat nozzle” setting and increase the temperature to the melting point of the stuck filament. Alternatively, hook your printer up to a computer running compatible control software and heat the nozzle using the software. For PLA, set the temperature to 220 ℃. Once the nozzle reaches the correct temperature, use a small pin to carefully clear the hole.
Push Old Filament Through
If the nozzle is still blocked, then you may be able to push the filament through with another piece of filament. Begin by removing the filament, then remove the feeder tube from the print head. Heat up the hot end to 220 ℃ and use another piece of filament to push the stuck filament through the nozzle. Pushing too hard may damage the printing rods, so be careful.
Dismantle and Rebuild the Hot end
If the nozzle remains blocked after trying the previous steps, you will have to dismantle the hot end. If you have not disassembled this piece before, take notes and photos so you know where everything goes when it is time to reassemble. Remove any filament that you can and follow the manufacturer’s instructions for dismantling the hot end.
Atomic Pull Method
Either ABS or Nylon can be used, but Nylon tends to work better because of its higher melting point. However, ABS is more common, so the steps below are written for ABS.
- Remove the filament in the print head. Then, remove the Bowden tube or release the direct drive so you can manually feed the filament.
- Increase the nozzle temperature to 240 ℃. Leave it at this temperature for 5 minutes before doing anything else.
- Slowly apply pressure to the filament until it begins to come out of the nozzle. Pull it back slightly and push it back through again until it starts to flow from the nozzle.
- Reduce the temperature to around 180 ℃ for ABS (experiment to find the exact temperature). Leave the printer at this temperature for 5 minutes.
- Remove the filament from the head. The end should have black carbonized material. Repeat this process until it is clean. If you cannot pull the filament out of the nozzle, increase the temperature slightly and try again.

Print Head Misses the Bed
What’s the problem?
If the print head is missing the bed, it will usually have reached the limit of the X or Y axis. A print head trying to move beyond this point can produce to a loud noise and will not print on the bed.
Why is it happening?
This often occurs as a result of misconfiguration, incorrect printer selection, or worn out end stops.
Troubleshooting
Check Slicer for Correct Printer
Check that the correct printer is selected in your printing software. All 3d printer models require specific settings, so even if the print bed of two printers are the same, other dimensions and settings are unlikely to match.
Update Firmware
If your printer is relatively new, ensure that the latest version of the firmware installed. Once it is updated, run the setup, and check all settings to ensure that the size of the print area is accurate.
Check End Stops
If all of the settings, firmware, and software have been checked, this issue is likely due to something physical. Watch the print head move. If it tries to continue beyond the end of an axis, check the end stop to ensure that it is connected.
If the issue persists, replace the end stops.
Snapped Filament
What’s the problem?
The filament spool looks full and there is filament in the feed tube, but nothing is extruding from the nozzle. This occurs more frequently with hidden-feed printers.
Why is it happening?
Old or low-quality 3d printing filament is often to blame. Although most filaments last a long time, problematic conditions (such as direct sunlight) can cause them to become brittle.
Tension that is too high for the filament’s diameter may also cause it to snap.
Troubleshooting
Remove and reload Filament
Remove the filament from the printer. As the filament will likely have snapped inside the tube, you will need to remove the tube from both the extruder and hot end. Then, heat the nozzle and pull out the filament. Reload with new filament and run a test print.
Try Another Filament
If the filament snaps again, use another filament type to check whether the filament used is old or brittle. If the new filament works, dispose of the old filament.
Loosen the Idler Tension
If the new filament snaps, loosen the idler tension entirely. As the print starts, slowly tighten it as recommended for your printer until the filament does not slip and runs smoothly.
Check the Nozzle
Check and clean the nozzle to remove any blockages.
Check Flow Rate and Temperature
If the problem continues, check that the hot end is heating to the correct temperature. Ensure the flow rate is 100%.
Stripped Filament
What’s the problem?
Stripped or slipping filament can lead to a lack of filament being extruded from the hot end.
Why is it happening?
Blockages, loose idler tensioner, and incorrect hot end temperature are common culprits. The knurled nut or toothed gear in the extruder is unable to pull or push the filament through the printer, grinding on the filament instead until it is stripped and unusable.
Troubleshooting
Manually Feed the System
If the filament has begun to slip, you may hear a noise and see plastic shavings. Apply gentle pressure to the filament to feed it through.
Adjust the Idler Tension
Loosen the idler, feed in the filament, and tighten the idler until it stops slipping. Filaments vary in diameter, so adjusting the tension may require some trial and error.
Remove the Filament
In most cases, you will have to remove and replace the filament before feeding it through the system. Remove the filament and cut the filament below the area showing signs of slipping/stripping. Then, feed it back into the system. If the filament has snapped, use new filament.
Check Hot End Temperature
Check the manufacturer’s instructions for the correct temperature for the filament you are using and reset the temperature accordingly.
Failed print - Extrusion Stopped Mid-Print
What’s the problem?
The hot end suddenly will not extrude filament.
What causes this problem?
There are two main problems that cause this to occur—either something is wrong with your filament supply or with the hot end/nozzle. Alternatively, the hot end may be blocked, preventing any further extrusion.
3d Printing Troubleshooting
Check That You Have Enough Filament
While this seems simple, many printers have hidden filament storage, and routine checks may slip your mind. Many slicers now have a material estimation; use the information to judge whether there is enough filament to fully print your project before starting.
Check for Stripped Filament
Review the stripped filament troubleshooting tip.
Check for a Clogged Nozzle
Review the clogged nozzle troubleshooting tip.
Check for Snapped Filament
Review the snapped filament troubleshooting tip.
Print Doesn't Stick to Print Bed
What’s the problem?
The print peels up or falls from the print bed. Lack of print adhesion is a common issue that can be caused by anything from print bed texture to a too-small first layer surface area.
Why is it happening?
Often, the print surface is not sufficiently textured to produce firm adhesion. Poor platform leveling or calibration can also cause this issue.
3D Printing Troubleshooting
Add Texture
Apply a thin layer of stick glue to the print platform. For PLA, evenly lay down painter’s tape. For filaments that require a heated platform of at least 40 ℃, use a specialty, heat-resistant tape.
Level the Print Bed
Refer to your printer’s manual or contact online 3d printing services for how to level your print bed and re-level it carefully.
Adjust the Nozzle Height
If the nozzle is too high, the filament will not stick to the platform. If it is too low, the nozzle will scrape the print off. Use the Z-axis offset option in your printer’s settings to make small adjustments (positive values raise the nozzle while negative values lower it).
Clean the Print Platform
If your print platform is prone to getting dirty or smudged, like glass, clean it thoroughly.
 |
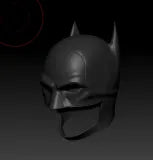
Batman 2021 Cowl STL | $20.00 USD | Shop Now |
Promote Build Plate Adhesion using Slicer perimeter settings
Some models with a small footprint require some type of perimeter to improve adhesion. Look for “Brim” and “Raft” settings in the printer’s software.
Brim will add a single layer of a specified number of perimeter lines radiating out from the point at which the print interfaces with the print bed. It does not use as much material as the Raft setting. Use a sharp blade to carefully remove the Brim after printing.
Raft adds a shadow of your print’s footprint in a thicker layer that is likely to adhere to the print surface. Rafts tend to create a rough surface at the point where it touches the actual print. Simply snap the adhesion base off the main print.
Add Supports
Models with complex overhangs or extruding parts benefit from supports to hold the print together and improve adhesion.
Supports Fell Apart
What’s the problem?
As your print is extruded, parts of the support structure are uneven, stringy, or cracked.
Why is it happening?
Support structures are complex, and most slicer applications will provide several options for printing them. Lines and zig-zags are generally easy to remove but are less rigid during the print process. Triangles and grids offer more support but can be difficult to remove.
Some slicing software enables you to print supports without platform adhesion. If this is the case, the small footprint of the support will not bond well with the print platform.
With tall models, the supports can be too long and thin, causing it to collapse under its own weight. Overly low density may also lead to failing supports.
Old or low-quality filament can cause cracking owing to filament brittleness.
Troubleshooting
Select the Correct Supports
If your print has large overhangs connecting sections of the model and they have sufficient contact with the platform, use line or zig-zag supports. If the model has less bed contact or requires more robust support, use grid or triangle supports.
Add Platform Adhesion
Check your model’s platform adhesion. Add a base for the supports if needed.
Increase the Support Density
If the problem persists, increase the support density. This will greatly improve stability but can drastically impact the ease of removing the supports.
Create In-Model Supports
Tall, thin supports on large models are prone to bending or breaking. Adding a tall block or other structure to your print that ends just below where the supports begin can improve support stability.
Change the Filament
Use different 3d solutech flexible filament and try again. If the problem is fixed, your old filament is likely old, low-quality, or damaged.
Check printer stability
There is a necessary level of movement during the printing process. Check all moving components of the printer to ensure that everything is tight and calibrated to reduce the level of movement during printing.
Leave a comment